A Thermal Imaging camera built on Raspberry Pi and FLIR Lepton module
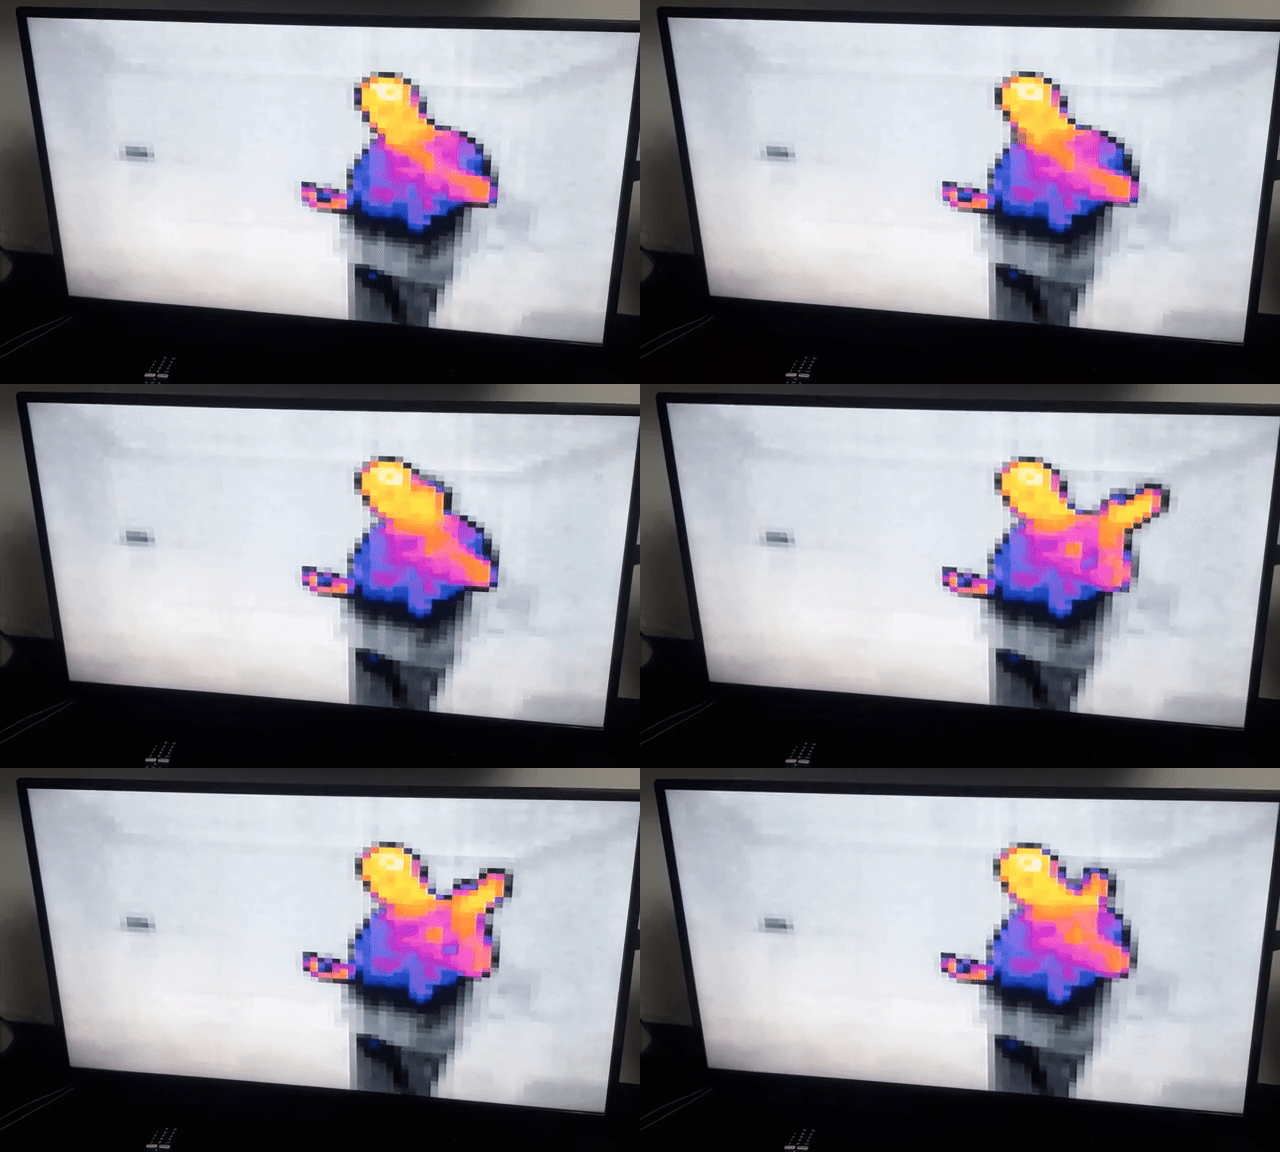
Indoor thermal imaging (person waving hand) close distance, grey background
|
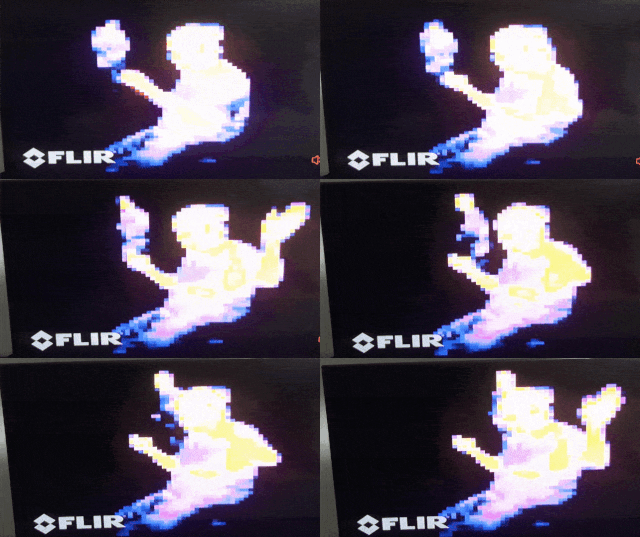
Indoor thermal imaging (multiple persons) close distance, black background
|
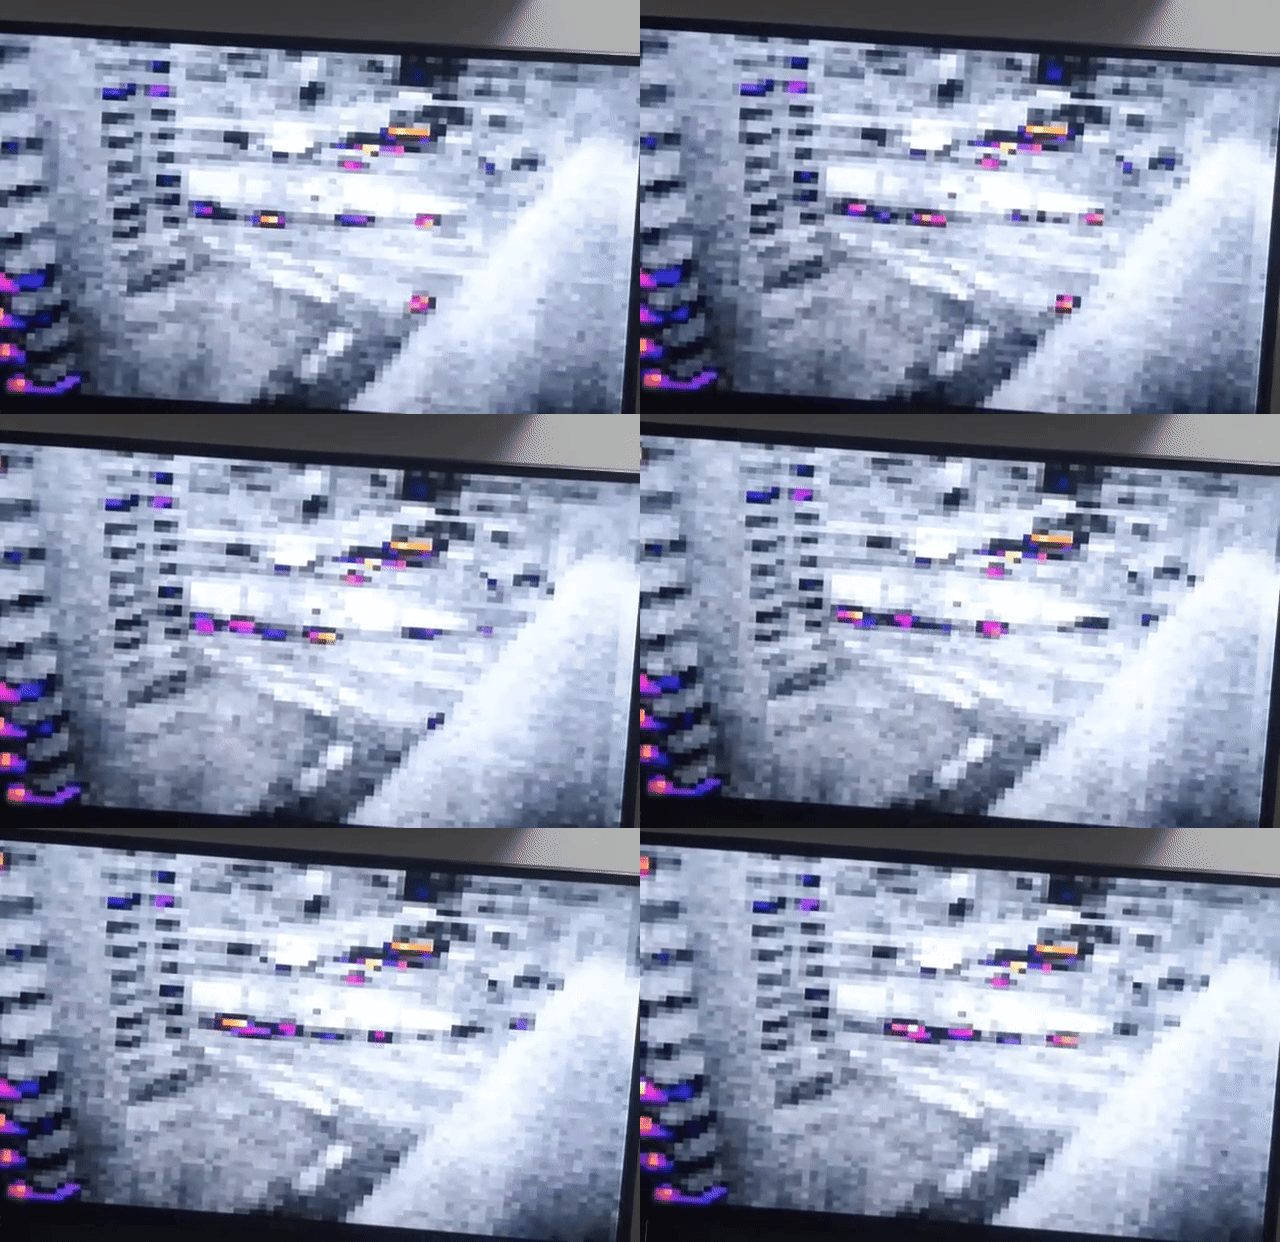
Outdoor thermal imaging (city buildings, streets and cars) medium-long distance, grey background
|
This repository uses the raspberry_video from the LeptonModule repository - by groupgets
What does the setupleptonrpi.sh script do?
This script automatically prepares a Raspberry Pi to run a FLIR Lepton thermal camera without a desktop environment. It configures the system to use framebuffer video output instead of HDMI or a window manager. The script enables the required hardware interfaces and installs all needed software dependencies. It downloads the thermal camera software, applies stability fixes, and builds it for the current Raspberry Pi. The display is configured for stable composite video output without boot messages on screen. A background service is installed so the camera starts automatically on every boot. The script can be safely run on a fresh system or on an existing installation. After completion, the device boots directly into a stable thermal camera view.
The project features a web app where you can view the video stream in real time and adust the camera/lepton settings. It's available on
http://your raspberry ip:8080
You will need:
- Raspberry Pi (zero, zero 2w, pi2, pi3, pi4, pi5, cm)
- FLIR Lepton module 2.X, 3.X (2.0, 2.5, 3.0, 3.5) Sparkfun
- FLIR Lepton Breakout Board (V2 used in this project but others might work too - untested) Sparkfun
- RCA Connector (for composite cvbs video) or HDMI cable
- Wires to solder
- 40 Pin connector for Raspberry pi (or solder directly to the pins)
- Connector of your choice for the Breakout board (or solder directly to the pins)
- 2A-5A 5V power adapter for the Raspberry Pi of your choice
- A TV or monitor that has either an HDMI or RCA composite video input
Install the Raspberry Pi imager and choose your Raspberry Pi model.
Choose Raspberry Pi OS (other) > Raspberry Pi OS (Legacy, 32-Bit) Lite
Set up your WiFi Connection if needed and enable SSH (You won't get direct console login on the screeen, login will only be available on SSH if you enable it during this process).
Write the SDCard
Boot the raspberry Pi and login trough SSH
Run:
sudo apt-get update
sudo apt-get install git -y
git clone --depth 1 https://github.com/sorinbotirla/Raspberry-Pi-FLIR-Lepton-Thermal-Imaging-Camera.git
cd Raspberry-Pi-FLIR-Lepton-Thermal-Imaging-Camera
chmod +xr setupleptonrpi.sh
# Choose between one of the following for black or grey background
sudo ./setupleptonrpi.sh --blackbackground
sudo ./setupleptonrpi.sh --greybackground
NOTE: The black background parameter is more suitable for detecting heat sources, while the grey background is more suitable for finer details, including more surrounding awareness.
Wait for the script to install everything and it will reboot itself. If you connect everything right, you will see the thermal image video on your screen in about 13-15s after the boot.
| Lepton Breakout V2 pin | Raspberry Pi GPIO pin | RCA Connector |
|---|---|---|
| VIN | 3.3V | |
| GND | GND | |
| CLK | GPIO11 | |
| MISO | GPIO9 | |
| MOSI | GPIO10 | |
| CS | GPIO8 | |
| SDA | GPIO2 | |
| SCL | GPIO3 | |
| VSYNC | GPIO17 | |
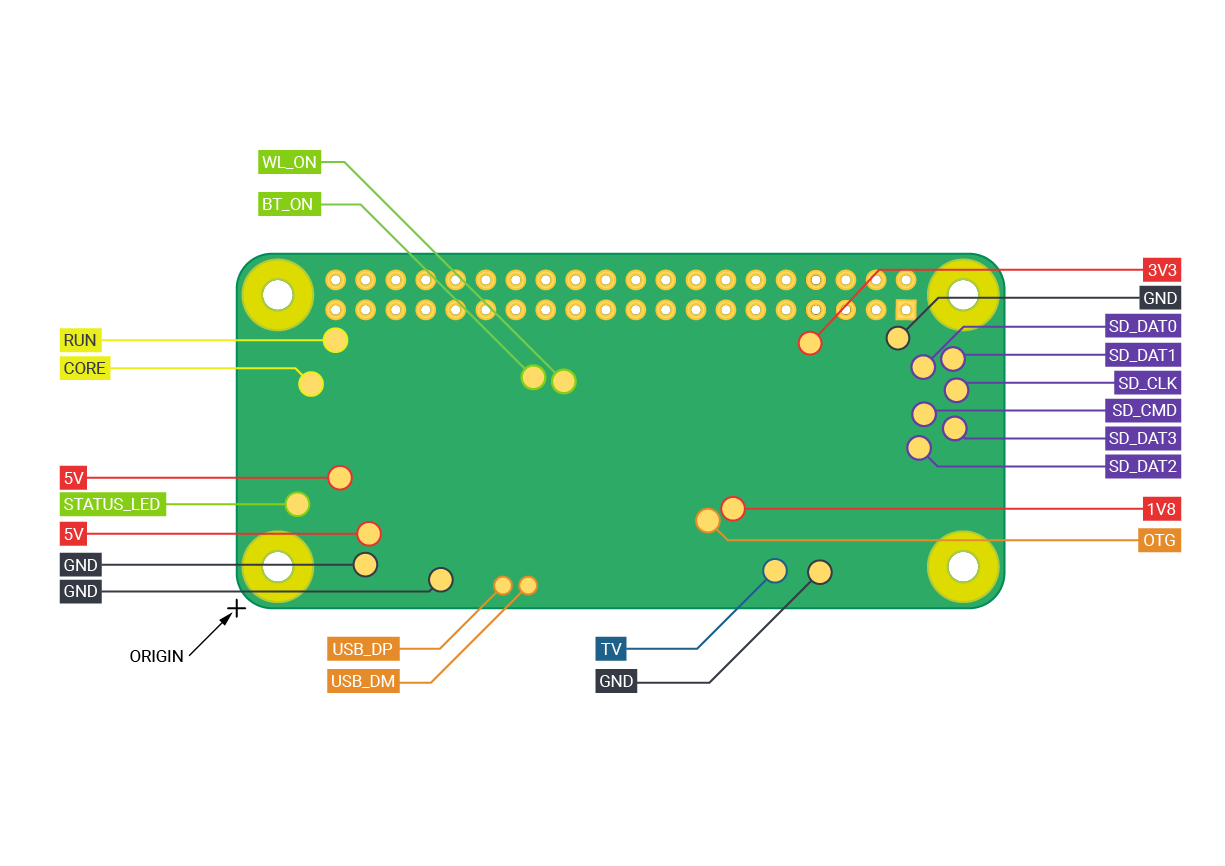
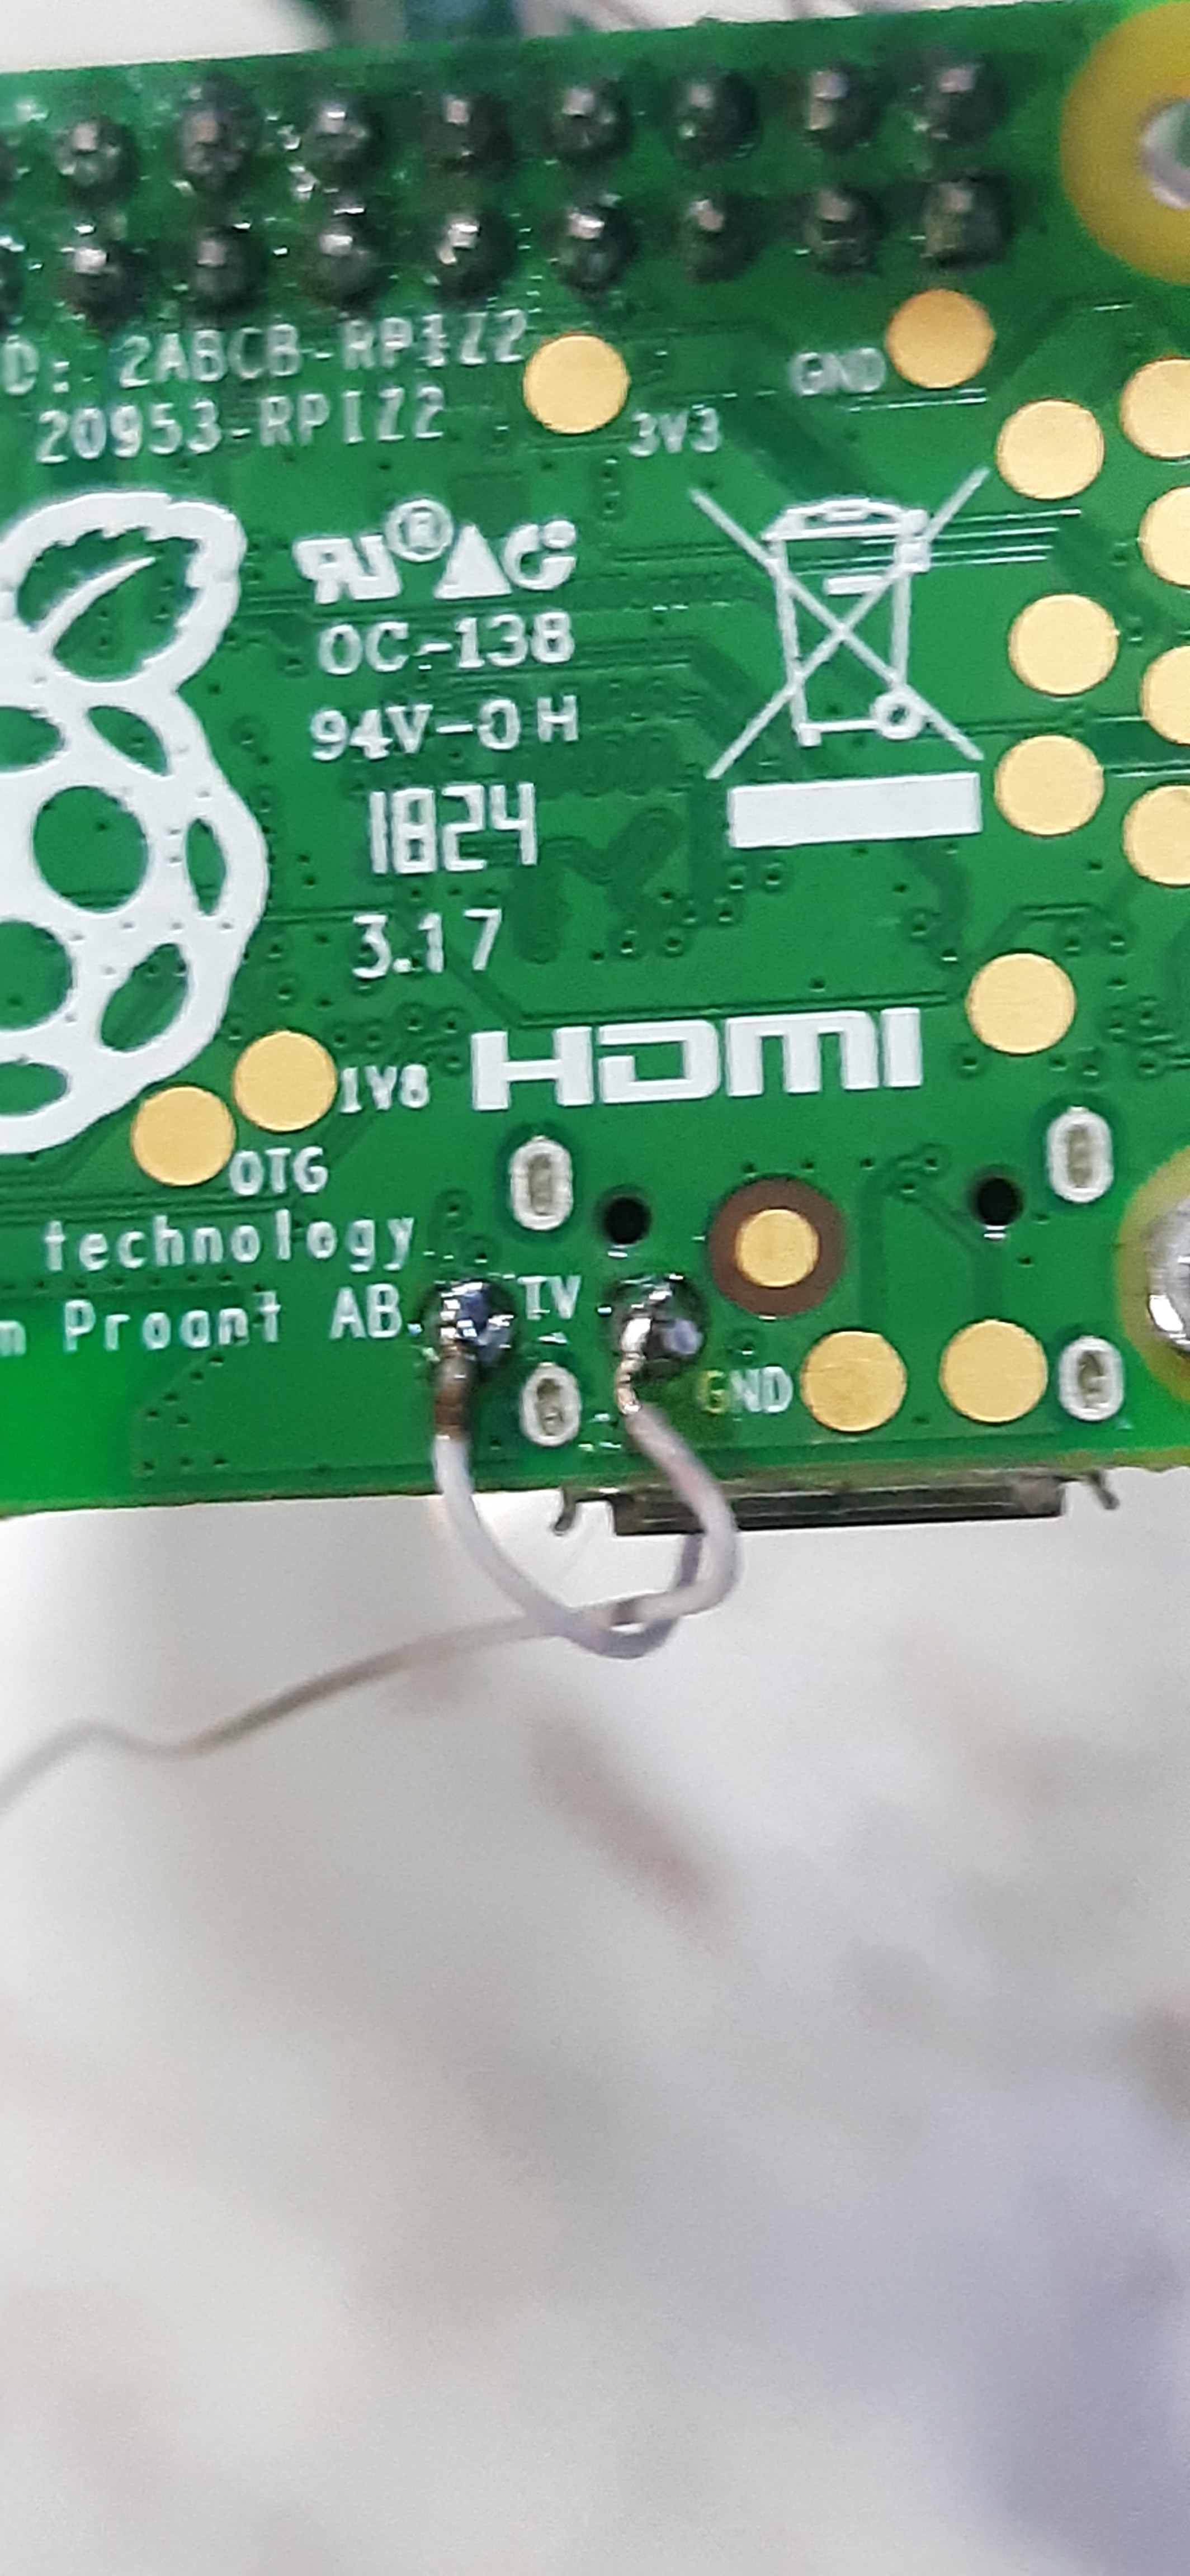
| TV OUT | RCA center pin = composite video signal | |
| GND | RCA shield = ground |
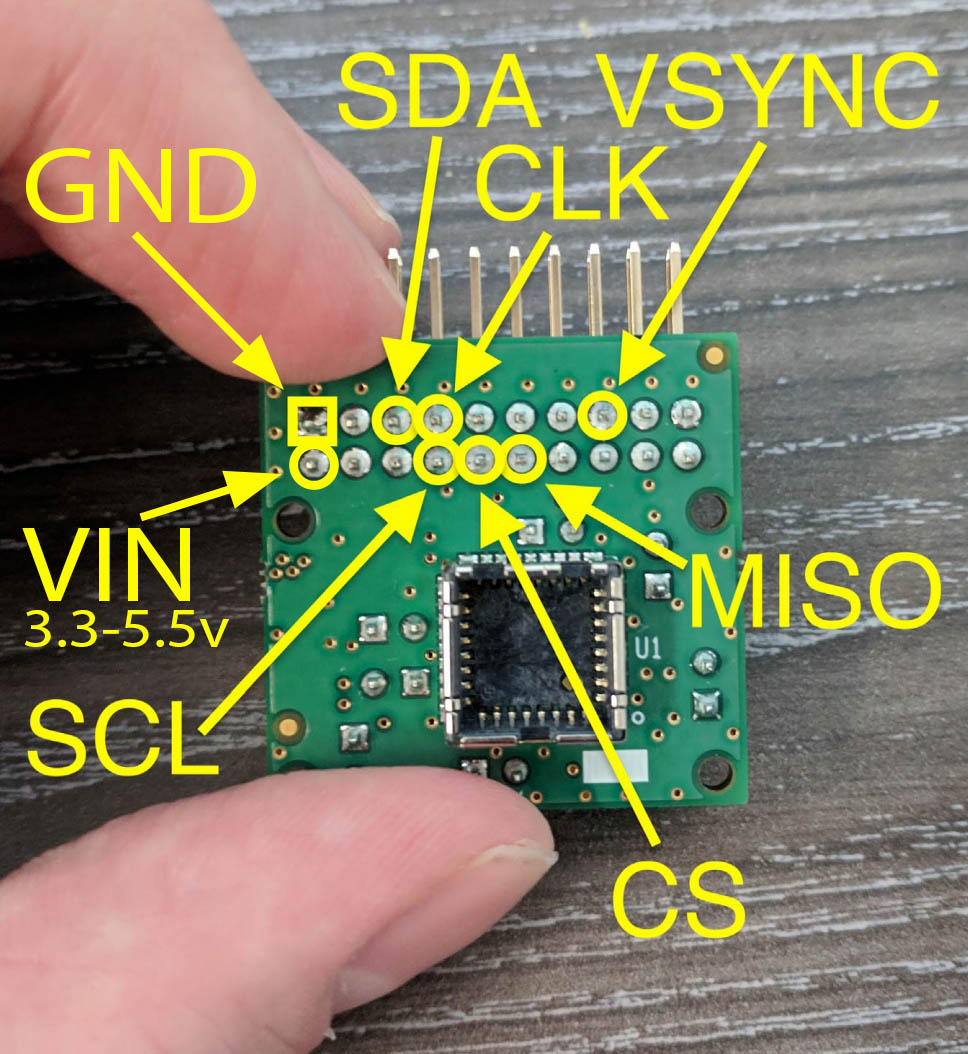 LEPTON Breakout V2 Pins
|
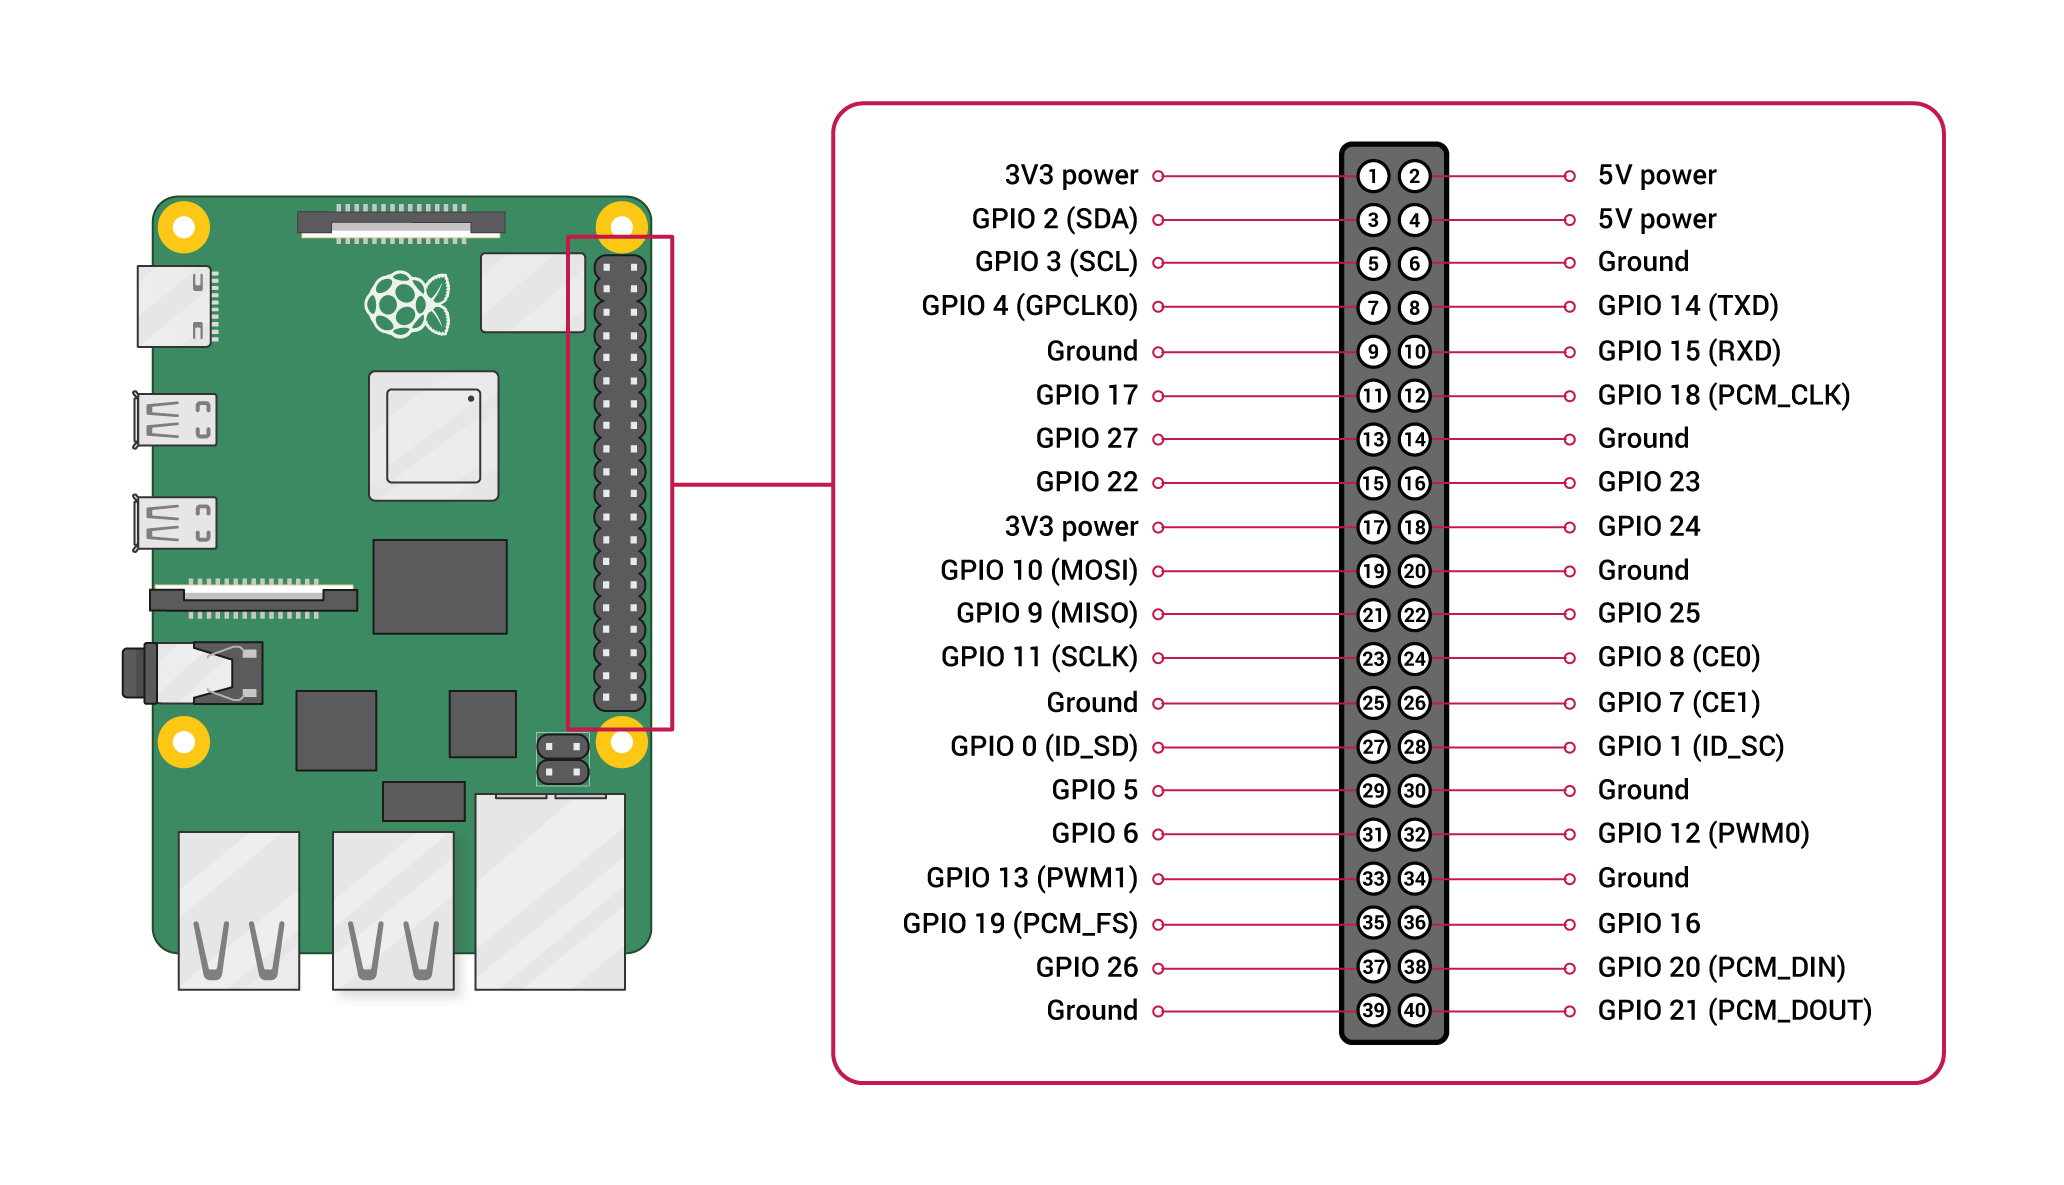 Raspberry Pi GPIO Pins
|
Example of the TV pins which were used in this project (RPI Zero 2W)
|
|
This project supports overlaying the thermal imaging over a video stream from an usb camera, for example, a laptop webcam can be tied to a usb cable and the images will be shown on the screen. I used an Adafruit Tiny USB Camera link for the small size convenience
You can adjust several settings in the webpage and do image alignment in real time. Or you can also send the commands in terminal/ssh like this:
set camera offset_x <px> // move camera layer horizontally
set camera offset_y <px> // move camera layer vertically
set camera scale <float> // scale camera layer
set camera rotate_deg <deg> // rotate camera layer
set camera opacity <0..1> // change camera opacity
set camera flip_h <true|false> // flip camera horizontally
set camera flip_v <true|false> // flip camera vertically
set camera emboss <on|off> // enable edge-only (contour) camera view
set thermal offset_x <px> // move thermal layer horizontally
set thermal offset_y <px> // move thermal layer vertically
set thermal scale <float> // scale thermal layer
set thermal rotate_deg <deg> // rotate thermal layer
set thermal opacity <0..1> // change thermal opacity
set thermal flip_h <true|false> // flip thermal horizontally
set thermal flip_v <true|false> // flip thermal vertically
set thermal smooth <0..N> // smooth thermal image (reduce pixelation)
bg black // set background to black
bg grey // set background to grey
Run each command like this:
echo "<command>" > /tmp/lepton_cmd

// example

echo "set camera opacity 0.4" > /tmp/lepton_cmd
Alternatively you can edit the ~/Raspberry-Pi-FLIR-Lepton-Thermal-Imaging-Camera/LeptonModule/software/raspberrypi_video/config.json and restart the service after you save the edits
sudo systemctl restart lepton-view.service
Composite video requires only two wires, which allows it to operate reliably over long distances, often exceeding 10 to 20 meters without significant interference. Using a thin coaxial cable enables even longer runs, typically between 50 and 200 meters. In comparison, HDMI cables are more sensitive to interference and do not perform well over long distances. Composite CVBS connections can directly replace existing CCTV cameras or automotive front and rear camera systems.
The most important thing, it doesn't measure the temperature, lol :)
Open source under MIT
FLIR, Teledyne, Lepton and their logos are trademarks registered and owned by Teledyne FLIR LLC
Raspberry Pi is a trademark of Raspberry Pi Ltd
HDMI (High-Definition Multimedia Interface) is a registered trademark of HDMI Licensing, LLC