
An advanced graphical dashboard for the Sunton ESP32-S3 8048S070 7" display, built with ESPHome + LVGL and integrated with Home Assistant.
The project provides a modern, clear, and highly readable interface for monitoring household energy consumption, photovoltaic production, inverter parameters, and environmental data.
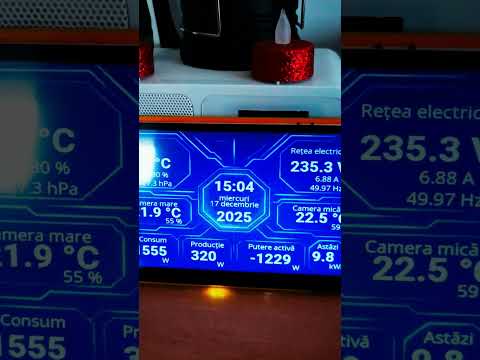
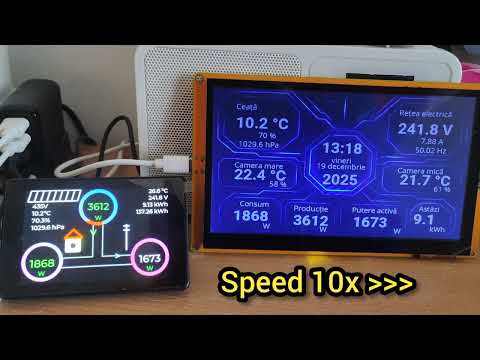
- Central clock with date, day, and year, synchronized via Home Assistant.
- Weather: condition translated into Romanian, outdoor temperature, humidity, and atmospheric pressure.
- Indoor rooms: temperature and humidity for two rooms, displayed symmetrically.
- Household consumption & photovoltaic production: energy values displayed in large font, with the unit “W” separated below for maximum readability.
- Active power: displayed distinctly, updated every 5 seconds.
- Inverter temperature: internal temperature value followed by °C, with a subtitle “INVERTER”.
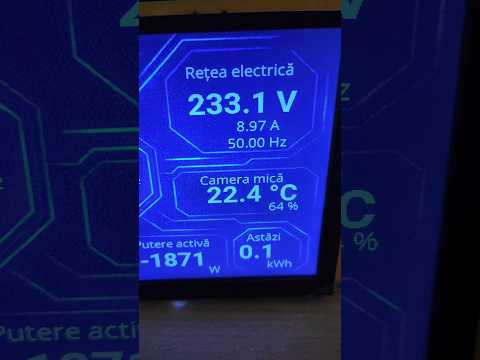
- Electrical grid: dedicated section showing voltage (V), current (A), and frequency (Hz), each with one decimal place.
- Optimized design: separation of numeric values from units, large fonts for critical data, small fonts for titles and labels.
- ESPHome for integration with Home Assistant and hardware control.
- LVGL for graphical rendering on the display.
- ESP32-S3 with PSRAM for performance and smooth updates.
- Custom fonts (OpenSans, Roboto Bold) with full diacritic support.
sensor.bme280test_bme280_temperature_2→ Outdoor temperaturesensor.bme280test_bme280_humidity_2→ Outdoor humiditysensor.bme280test_bme280_pressure→ Atmospheric pressure
sensor.t_h_sensor_6_homerseklet→ Room 1 temperaturesensor.t_h_sensor_6_paratartalom→ Room 1 humiditysensor.andras_szoba_temperatura→ Room 2 temperaturesensor.andras_szoba_umiditate→ Room 2 humidity
sensor.bidirectional_energy_meter_power_b→ Household consumptionsensor.inverter_active_power→ Photovoltaic productionsensor.power_meter_active_power→ Active powersensor.inverter_internal_temperature→ Inverter internal temperaturesensor.power_meter_tensiune→ Grid voltagesensor.bidirectional_energy_meter_current_b→ Grid currentsensor.power_meter_frequency→ Grid frequency
weather.forecast_home
This project includes example entity IDs from my own Home Assistant setup.
Every user must replace these entity IDs with the ones from their own Home Assistant server.
To find your entity IDs:
Home Assistant → Settings → Devices & Services → Entities → Search → Copy entity_id
Then update the YAML file accordingly:
sensor:
  - platform: homeassistant
    id: living_temp
    entity_id: sensor.YOUR_TEMPERATURE_SENSOR
This project uses custom fonts for clarity and diacritic support:
OpenSans-Regular.ttfRoboto-Bold.ttf
They are included in the /fonts folder.
Copy them into your ESPHome configuration directory before compiling.
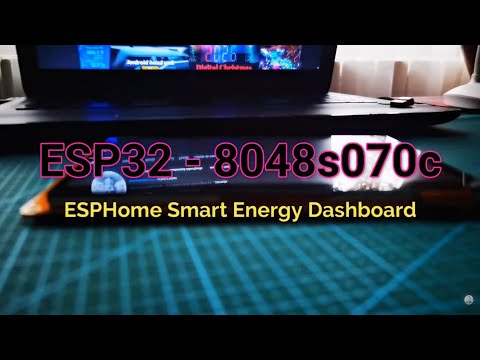
Click on the image to play the video.
Download for Windows: https://www.python.org/downloads/windows/
Make sure to check “Add Python to PATH” during installation.
Recommended version (fully compatible with this project):
pip install https://github.com/esphome/esphome/archive/refs/heads/dev.zip
Deprecated (may cause LVGL build errors):
pip install esphome==2025.11.0
pip install --upgrade esphome==2025.11.0
If you encounter the following error during compilation:
TypeError: VariableDeclarationExpression.__init__() got an unexpected keyword argument 'static'
it means that the installed ESPHome version is not compatible with the external LVGL component.
Uninstall ESPHome:
pip uninstall esphome -y
pip cache purge
Install the development version (100% compatible with this project):
pip install https://github.com/esphome/esphome/archive/refs/heads/dev.zip
This version includes the required fixes for LVGL and works without issues.
git clone https://github.com/DaradiciLevente/ESP32-8048S070c-ESPHOME-HOME-ASSISTANT-DASHBOARD.git
Wi‑Fi credentials are stored in secrets.yaml:
wifi_ssid: "YOUR_WIFI_NAME"
wifi_password: "YOUR_WIFI_PASSWORD"
The OTA / ESPHome API password is inside the main file (esp32-8048s070c-Dashboard-Final.yaml):
ota:
  - platform: esphome
    password: "a07ce4750cc57b5360162ba12f209d3f"
esphome run esp32-8048s070c-Dashboard-Final.yaml
Once the ESP32 boots and connects to Wi‑Fi:
• Open Home Assistant.
• Go to Settings → Devices & Services.
• Home Assistant will automatically detect the ESPHome device.
• Click “Configure” and enter the same API password used in the YAML file.
The dashboard will now appear as a device with entities.
This project exposes a switch entity in Home Assistant that controls the display backlight.
You can use it to:
• Turn the display ON when motion is detected in the room
• Turn the display OFF at night so it doesn’t disturb sleep
• Manually toggle the screen from the HA dashboard
• Integrate it into automations, scenes, or scripts
• If any motion sensor in the room detects movement → turn on backlight
• If no motion for 30 seconds → turn off backlight
• At night (23:00–07:00) → keep backlight off unless manually enabled
This makes the dashboard behave like a smart, presence‑aware control panel.
The /Examples folder contains several minimal, easy‑to‑understand ESPHome configurations that demonstrate how to use the ESP32‑8048S070C display in the simplest possible way.
• How to initialize the 8048S070C display in ESPHome
• How to set up LVGL graphics (basic labels, colors, layouts)
• How to handle the touchscreen (touch events, coordinates, button presses)
• How to structure a clean ESPHome configuration for display‑based projects
• beginners who want to understand the basics
• developers who want a clean starting point
• anyone who wants to experiment with LVGL + ESPHome on this display
• If you want to build your own UI or learn how the display works internally, the /Examples folder is the best place to start.

• Added the file esp32-8048s070c-Burgundy.yaml to introduce a new Burgundy-themed variant.

• Added the file esp32-8048s070c-Green.yaml to introduce a new Green-themed variant.

• Added the file esp32-8048s070c-Emerald-Green.yaml to introduce a new Emerald-Green-themed variant.

The actual display looks noticeably better than in the attached photo.
This project would not have been possible without the excellent work of the open‑source community.
A special thank‑you goes to the author of the following project:
The display driver configuration and graphical initialization used in this dashboard are based on the outstanding work from:
➡️ Author: https://github.com/clowrey
Their implementation made it significantly easier to integrate the 8048S070C 7" display into ESPHome, providing a clean, stable and well‑documented foundation. Huge thanks to the original author for sharing this work with the community.
This project is open-source and distributed under the MIT License.
See the LICENSE file for details.